
First quilt finished and many more made!
Hello everybody! I thought you all deserved an update after my year long absence from blogging. The original Jacob’s Ladder quilt that I was documenting the progress of through this blog is finished. Here’s a picture:

Jacob’s Ladder patchwork quilt by Life’s Materials http://www.lifesmaterials.com
And the big news is that I have started a patchwork quilt business. I have spent the year making pacthwork quilts, cushions, baby keepsakes and… specialist martial arts weapons bags (yes, you read that right). You can have a look at all of them here: www.lifesmaterials.com
There are social media links on the website to follow my progress. Hope to see you all on Facebook, Google+ or Pinterest!
Quilting the big quilt
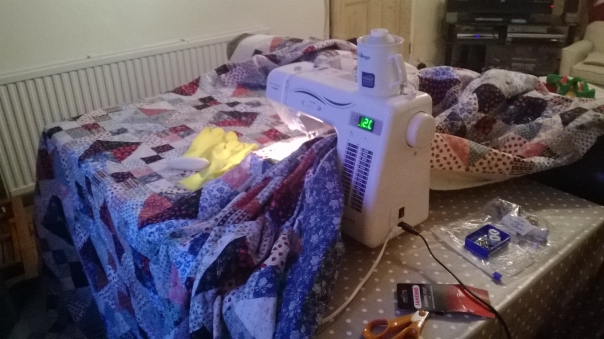
My quilting station is organised. The quilt is so huge that I am using all of our dining table and the sofa in front of it to drape the thing over and keep it as flat as possible.
I have started in the middle and shoved half of the quilt under the arm of the sewing machine so that I can smooth out any lumps and bumps towards the edges as I go along.
My thread spool is too big to be held tightly on the machine, so I have put it in a cup which is just about as wide as the bottom of the spool. I just rested it on top of the machine and amazingly it stays where it is while I am sewing.
I have a pot to hand to stash the safety pins in as I take them out when I have quilted a section of the quilt and also my trusty rubber gloves with the fingertips cut off to help me glide the quilt smoothly as I free-motion quilt.
I’m all ready to go!
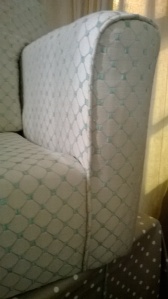
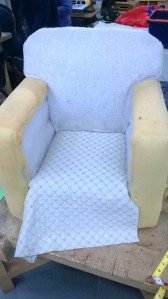
The small armchair is finished
The first piece of fabric to be secured was the bit covering the seat and the front of the chair. Then I moved onto the arms.
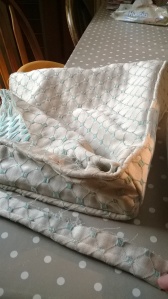
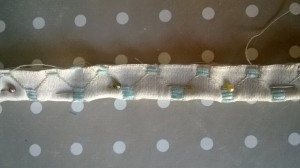
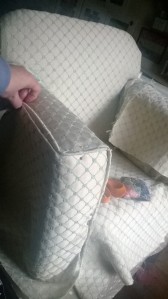
After securing the sides of the chair cover over the arms and underneath the chair frame with staples, I grabbed part of this piece of fabric from the back of the chair to pull it tightly and fix it. There wasn’t quite enough of the fabric to staple securely, so I tacked a piece on (the bit you can see me holding) and sewed a length of cord onto a very tiny piece to help me yank it through from the front.

One of the next jobs was to sew the two sections together with an invisible ladder stitch into the seam with the piping. You can’t see my stitches, can you? That’s because they’re invisible.
I may only use ladder stitch ever again on every project from now on. I have grown to love it.
 In order to get a straight seam along the back of the chair, I used a length of thick cardboard tape, which I stapled to the top of the chair. I covered it with a bit of polyester to smooth out the edges before flipping the fabric over and revealing a beautiful seam in which all of the squares in the pattern lined up (this took a very long time to get right).
I then ladder stitched the back panel to the chair using a curved needle and working a little way down one side, then switching to the other so that the seams were even and the tension equal on both sides. I had to use three panels of fabric for the back panel, to use up bits I had left over. I am very pleased that I was able to match these squares up too.
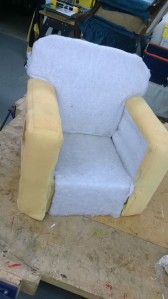
After having secured the cover (I know I make this sound easy; it actually took a lot of hours and much unpicking of staples and re-stretching of fabric), it was time for the fun jobs of making a piped cushion with welts for the seat of the chair and a mini piped scatter cushion for my son’s back (and stapling black bottoming onto the, er, bottom)…

It’s finished! It just needs its feet.
Making a cushion for the seat

A reminder of how it used to look
An upholstery project for an evening
I’ve had this large blanket box hanging around for ages, winking at me and flaunting its faded fabric and stained wood.

So I decided to take the lid off…:
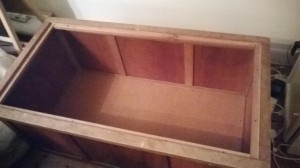
…remove the panel from inside the lid and recover it in new fabric:

I now have a blanket box that matches the little armchair I am re-upholstering. All it needs now is to be repainted. That will take me longer than an evening, but be assured, a blog post charting its progress will surely follow!

Quilting again
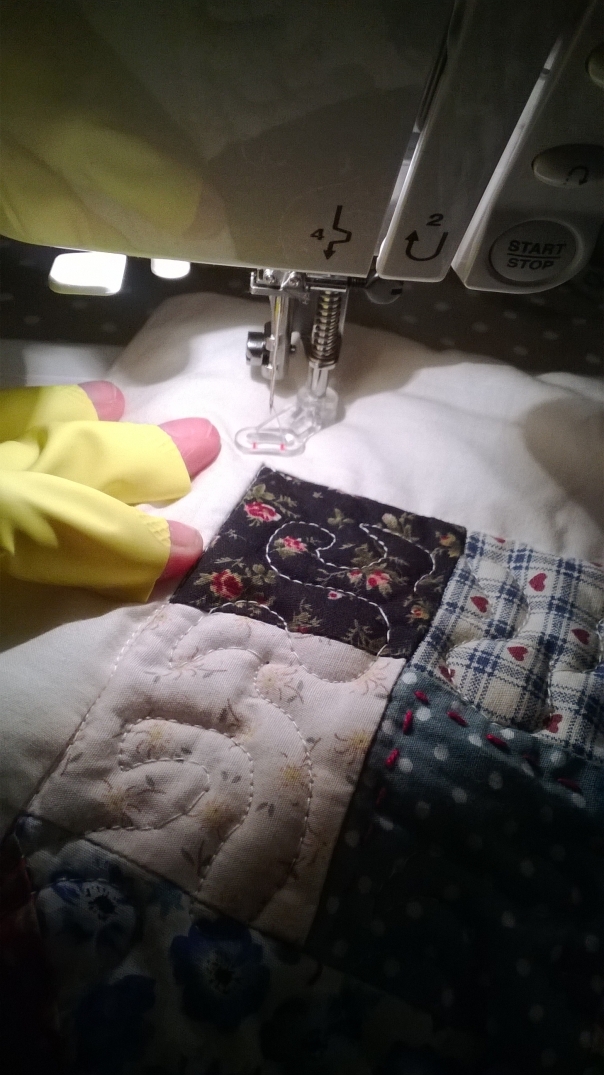
Hurrah! Posh new sewing machine has arrived and I can get on with quilting my first quilt.
Here’s a practice piece before I start on the real thing. It’s a tiny dolly’s quilt that I made for my son.
Notice the low-tech quilting glove solution to help me glide the quilt around as I free-motion quilt.
Looking more like a chair
I have managed to sort out my issue with this chair. I had threaded the cane too closely together from left to right, meaning that the holes between the canes were far too bunched. It would have been impossible to thread the diagonals through them.
Now, however, I have removed some and rethreaded others in a two hour rescue operation.
Lessons learnt about caning a round seat today: 1 never do it again. 2 If you forget number 1 for some reason, thread by eye, rather than counting holes so that your canes produce evenly spaced square holes.
Beginning to upholster the little armchair
I have had a few weeks away from upholstery so I could concentrate on getting underway with some Christmas presents (no photos of those yet, for obvious reasons!), but this week I have got on pleasingly well with my son’s chair.
Firstly, I stripped the child’s armchair of all of its original fabric, removing as many staples as possible.
Next, I tucked a piece of the new fabric into the seat, making some snips at the front of the seat so that the fabric would fit around the wood of the chair’s arm. The tails at the back and front are long enough to staple onto the wood of the frame later.
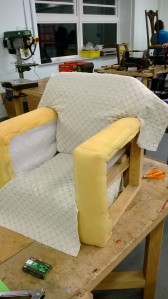
After that, a piece of fabric went over the back of the chair, again, with strategic snips around the back of the arm so that it could be wedged neatly around the foam.
This piece was tricky as I had to ensure that the lines of the pattern were all straight enough so that the arms looked even.
No idea why I chose patterned fabric for my first upholstery project. I have no excuses as I was warned.
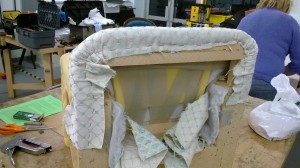
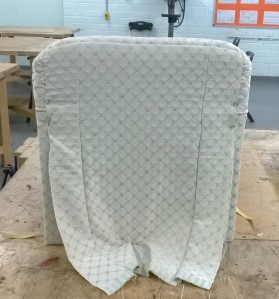
Here’s the back, stapled securely with pleated curves.
It looks very uneven here as my main concern was to get the line of the pattern straight across the top of the chair, while pulling the fabric tightly enough so that there would be no sagging later.
You can also see bits of fabric poking through from the seat piece and also from the bottom of this back piece.

This picture shows you where I have to work when I am not in the workshop: sharing table space with my little boy and his toys. He knows by now not to touch any pointy or bladed things.
I made piping from scrappy bits of fabric joined together at 45 degree angles.
Here’s the piping casing all pinned and ready to sew. I really needed a zipper foot attachment for this job so that I could get my line of sewing as close to the piping as possible. My zipper foot didn’t fit the sewing machine, though, so I just used a straight stitch foot, wedging the piping cord underneath the foot in rather an unsafe and uncontrollable manner.
Seems to have done the job.

The exciting bit – sewing the piping into the arm covers. I worked from the top right corner of the arm first, sewing straight down to the bottom of the chair.
The next bit was quite awkward. I had to sew each section of the cover individually, measuring (very carefully) each time. It wasn’t enough to make sure that the cover fitted the arm and the corner was perfect, but I also had to continually check that all the squares of the pattern lined up and also that grain of the squares faced in the right direction.
I found myself asking again why I had not chosen a plain piece of fabric. Oh, and there was also a little swearing here, too.
The finished arm pieces are now all ready to be stapled into place. I’m very pleased with myself and looking forward to tacking it all down.
My boy keeps saying “when are you going to mend my chair?”
Shouldn’t take too long now!

Another chair to work on
I felt I needed a counterpoint to the faithful restoration of my great-grandfather’s Victorian wooden and cane chair, so I have started re-upholstering a small armchair for my little boy.
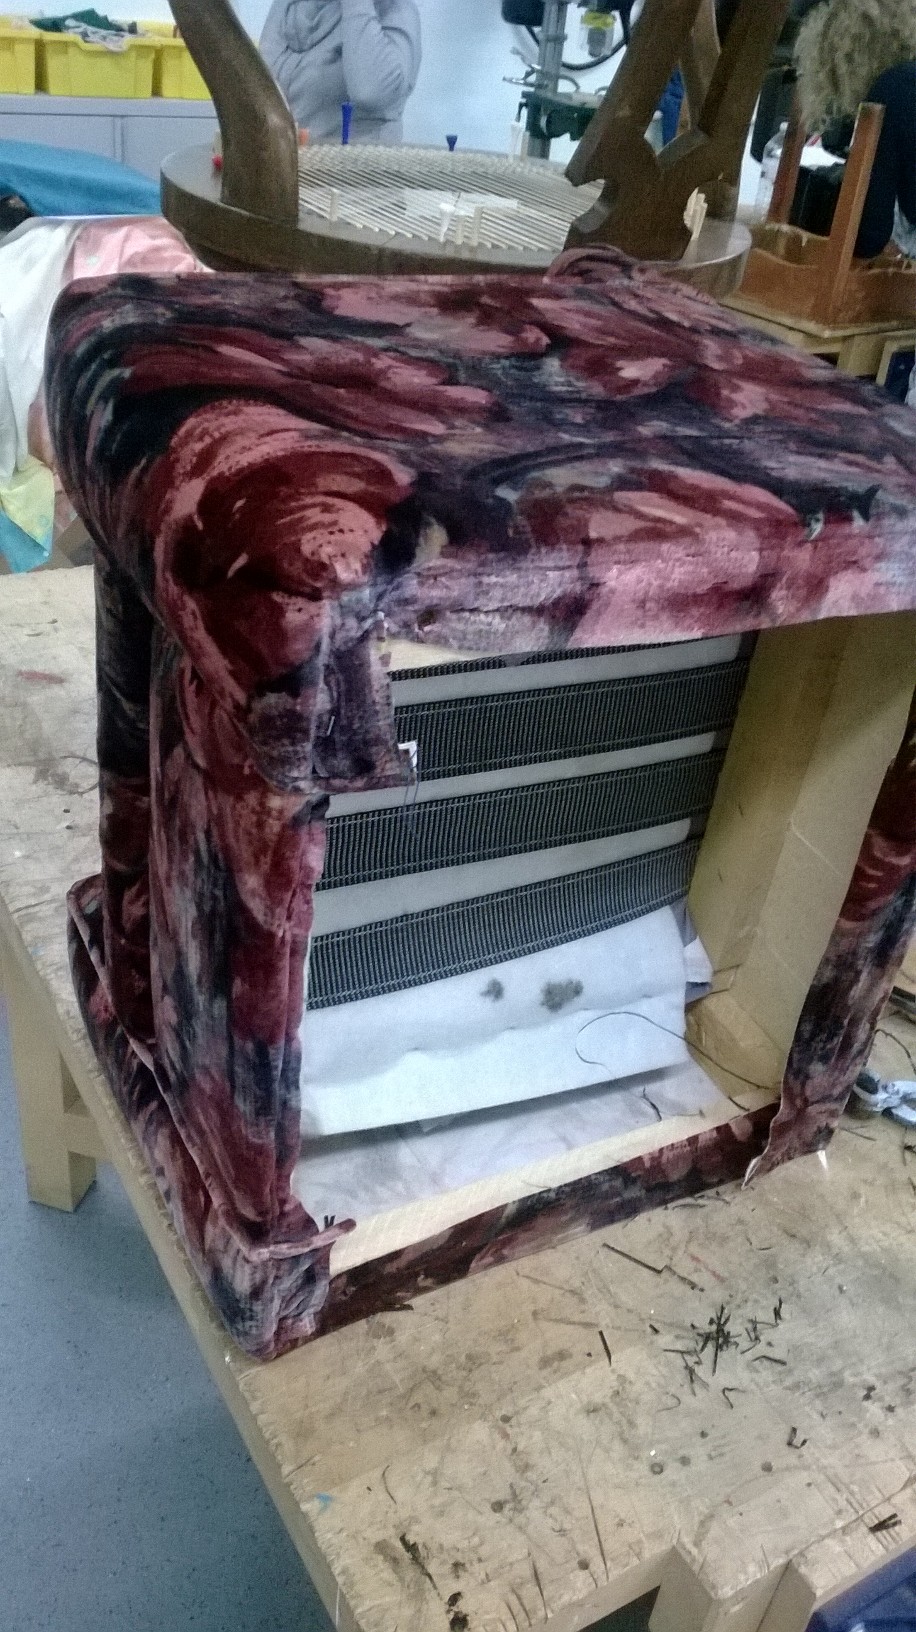
It is currently covered in a revolting velour-style fabric which has stains all over it from its previous owner, but it’s a great shape and should be big enough for my son to use for two or three more years:
To begin with, I removed the cheap plastic feet and material from the bottom of the chair. I may replace the feet with wooden ones when I have got to that stage as I think they will look better.

Once the material was removed, I discovered that rather a lot of MDF had gone into this little thing, rather than the solid wood I was expecting. This is a very different beast to my other chair project:
I am now at the stage where I need to remove all of the charming fabric from the back and sides of the chair.
It took me quite a while just to do the back as I was trying to lever all of the staples out in a stupid way that was hurting my hand. You can see the plastic feet in the bottom right of this picture:

When I get on to removing the fabric from the sides I will be much quicker; and hopefully the staples won’t fling all over the workshop when I get better at it. Perhaps they’ll even remain in the workshop and not drop out of my clothing when I am getting ready for bed after an evening of furniture restoration.
Unfortunately, this chair cannot move between the house and workshop like the other one can as I can’t guarantee that I haven’t left any lethal rusty staples sticking out of it. My son loves to sit in it and won’t understand why it’s dangerous. Well, he loves to sit on his other small chair (restored perfectly by his daddy) and put his feet up on this armchair, while playing his keyboard which he rests on the arms of the armchair.
Still, an upsetting staple incident could ensue and is entirely unwelcome; so for now, the chair lives in the car.
My boy never goes near my great-grandfather’s chair. I think the strange disappearing and then reappearing cane seat freaks him out a bit.
Doubling up
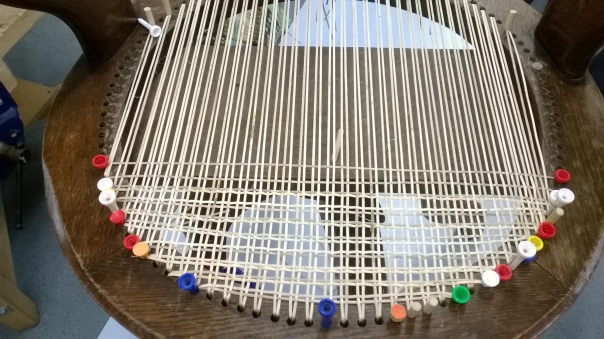
The next stage of the re-caning process is to double up on each of the canes that I have already threaded. You can see in the picture below that I started at the left and worked in towards the centre, then moved over to the right and worked in towards the centre again.

Here’s the underside of the seat. The trick is to make sure you fill in all of the loops to keep it tidy. I also need to keep the canes as flat as possible to reduce bulk. Did you know canes have a top and a bottom side? The top side is rounded, so there’s an added element of care that needs to be taken to ensure that every cane I thread is facing the right way up.

The seat with all of its threads doubled up. Beginning to need lots of golf tees to keep the loose ends secure now.

Ready to start the weaving process! Here’s how I began my first line of weaving. I am using a caning needle to move the cane over, under, over, under, over, under (etc. etc.) the canes that are there.

I’m very proud of this. Only a million more lines of weaving to go.

